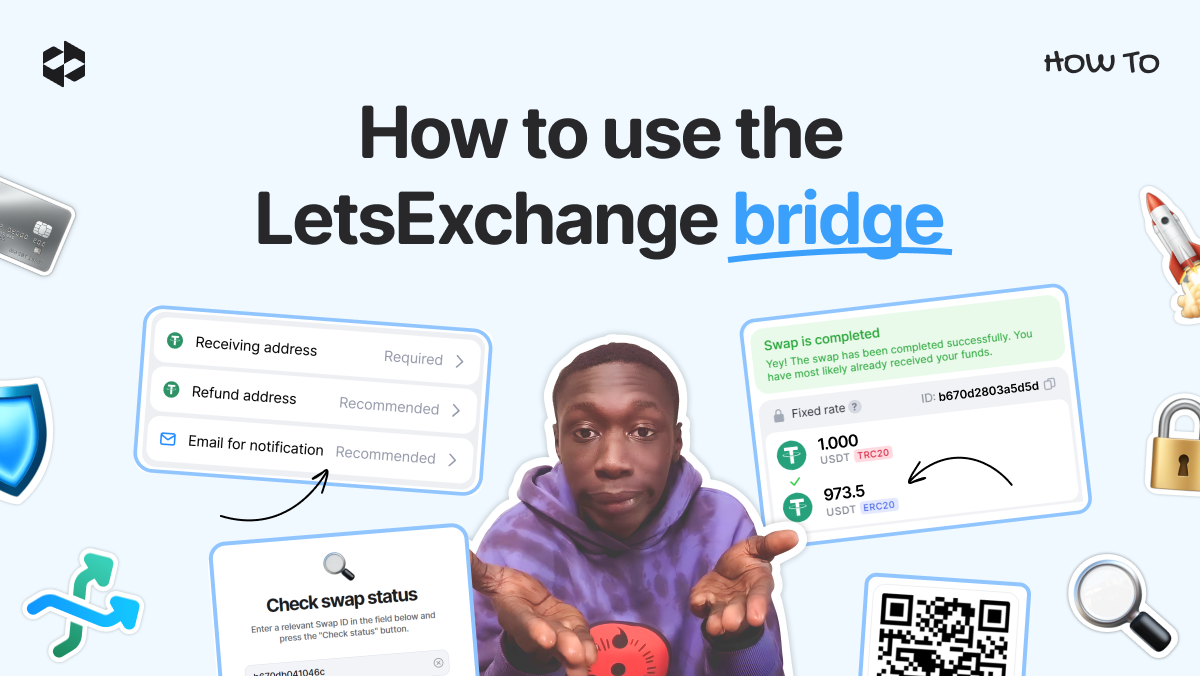
Crypto bridges solve a crucial challenge that prevents blockchain from being adopted massively: interoperability. However, using bridges comes with additional concerns, such as costs (a bridge charges a fee) and security concerns, because these solutions often become targets of hacks. Moreover, many regulators consider bridges a method for laundering illegally obtained funds. Therefore, the funds received through cryptocurrency bridges are often challenging to use afterward, as they trigger AML checks.
LetsExchange offers an efficient solution to these issues. The platform doesn’t use a bridge in its common sense but instead relies on multiple major liquidity providers for cross-chain swaps. This is why you:
- Save money because you do not pay a bridge fee
- Benefit from additional security because you do not send funds to a bridging solution
- Receive funds that have a legal origin.
Step-by-step instructions on how to perform cross-chain swaps on LetsExchange
To swap coins that run on different blockchains, perform the following steps.
Open the exchange widget. Click on the Bridge tab.

In the You Send field, select the coin to swap. On default, USDT is chosen, but you may select any available cryptocurrencies. Type in the number of coins to swap. The number to receive will be calculated automatically and displayed in the You Get field. All fees are already included in this sum.
Select the blockchain on which your coin is. In the example, we will be swapping USDT on the Tron blockchain (USDT TRC 20).
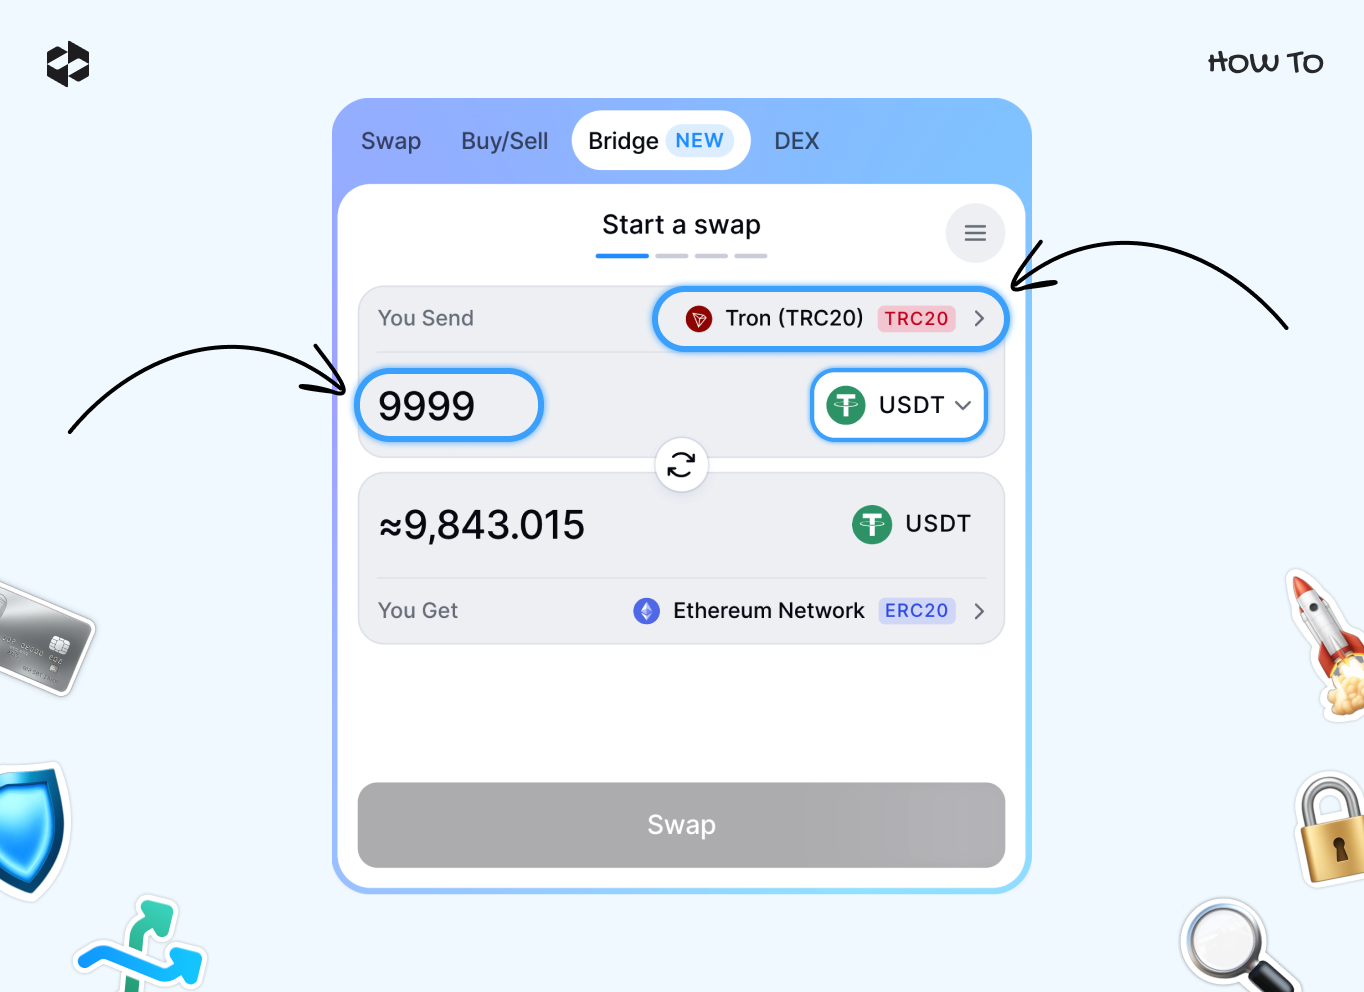
If you need to change the blockchain, search and pick the right one.

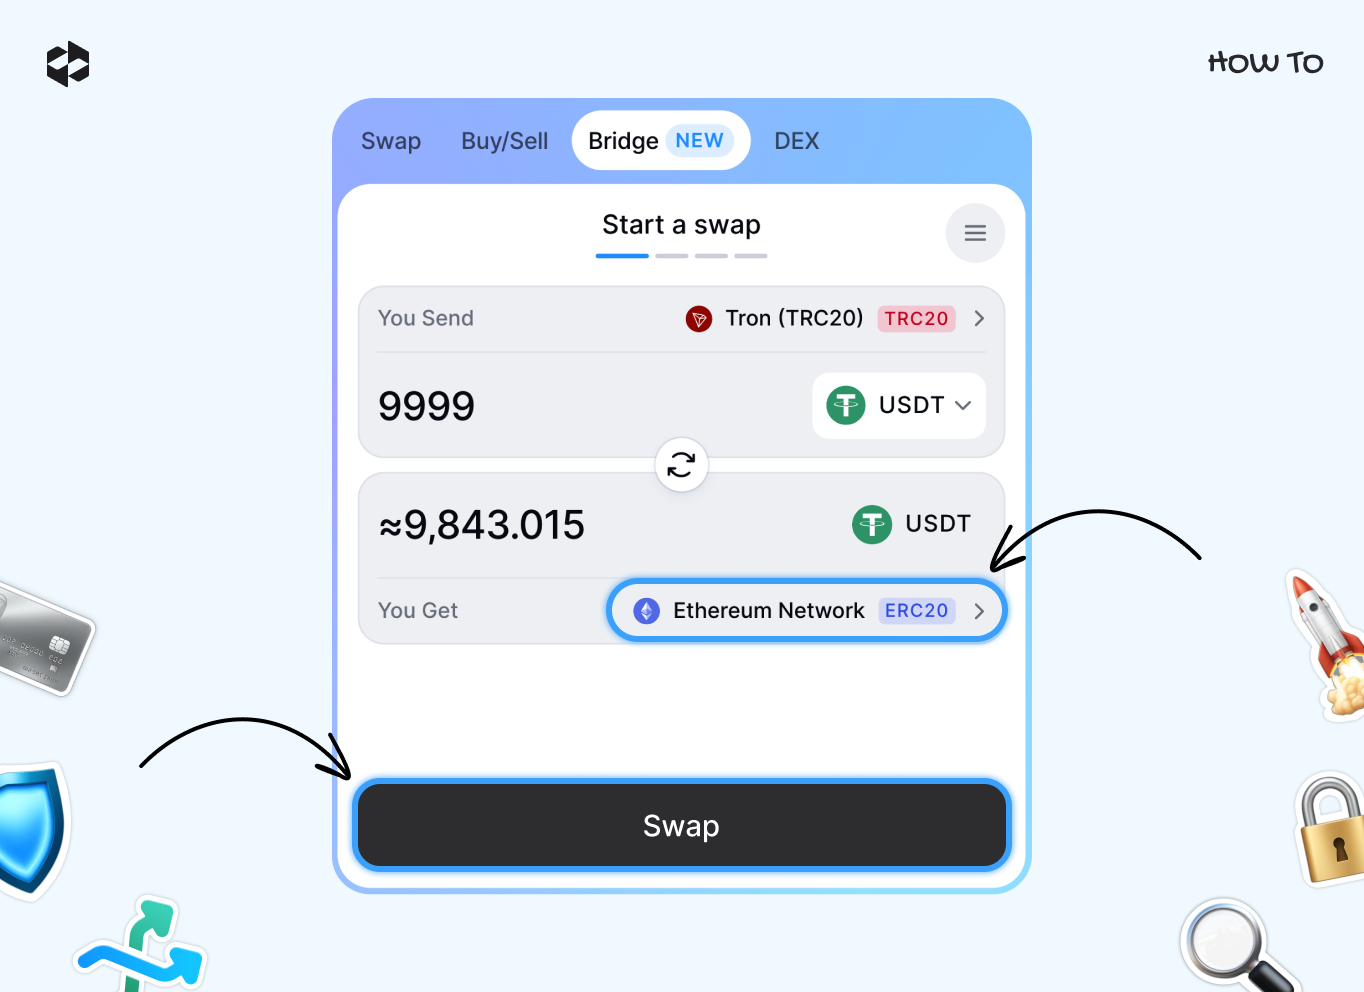
Select the blockchain on which the coin you want to receive is supported. In the example, we will swap USDT TRC20 for USDT on the Ethereum blockchain (USDT ERC20).
If you want to select another blockchain, please click the right network. When all the fields are filled in, click the Swap button to proceed.
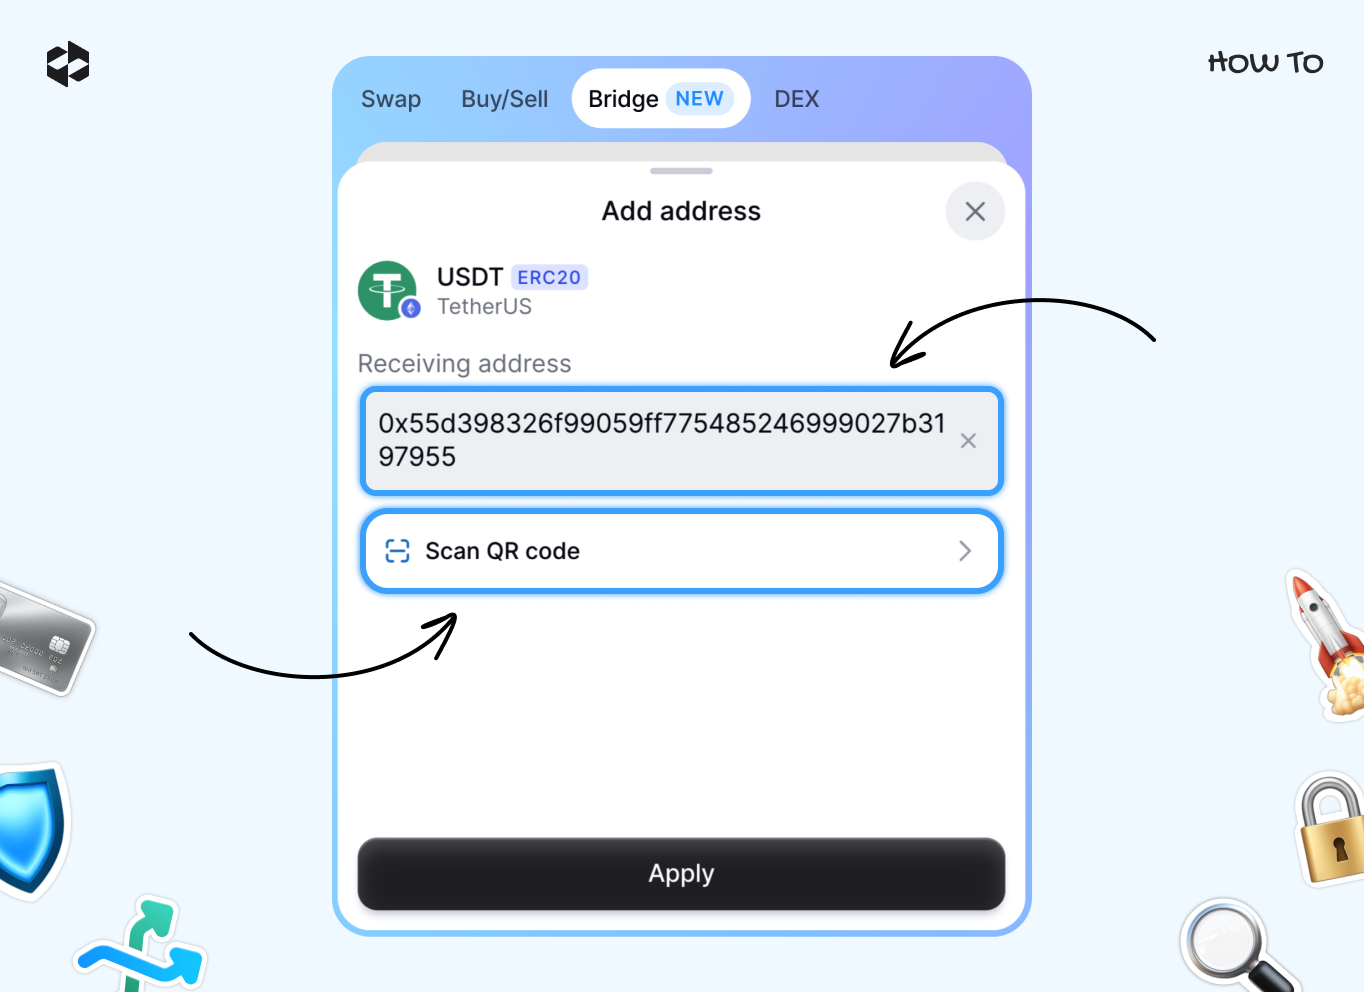
Provide the receiving wallet address. The platform will send the swapped coins to that address. Make sure you’ve chosen an address in the correct blockchain.
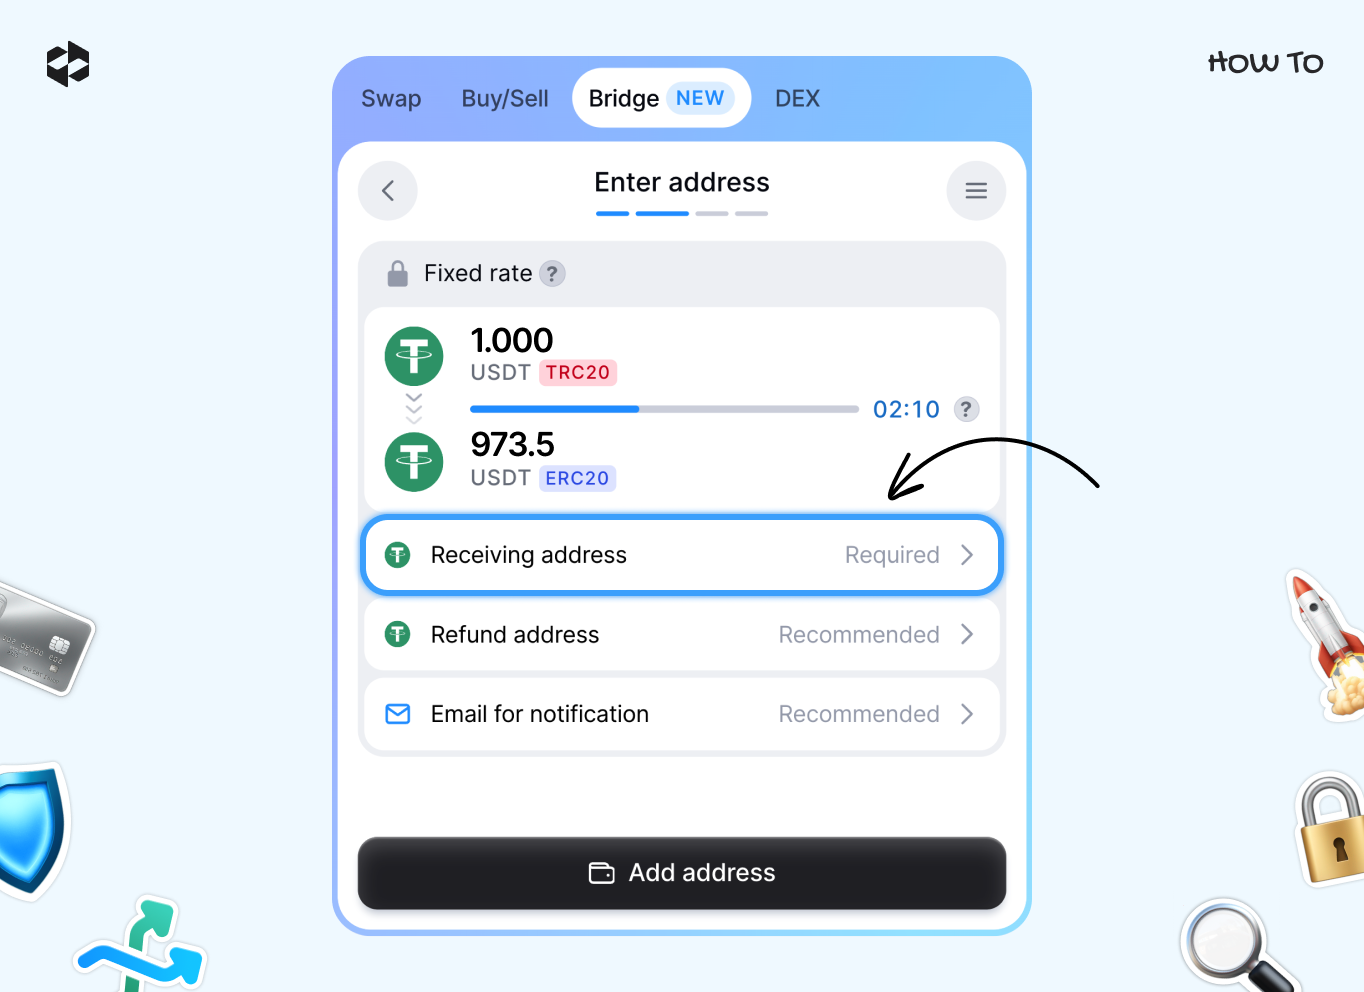
You may either copy-paste the wallet address (make sure you copy ALL symbols, otherwise, your funds will be lost) or scan a QR code. Click on the Apply button to save the data.
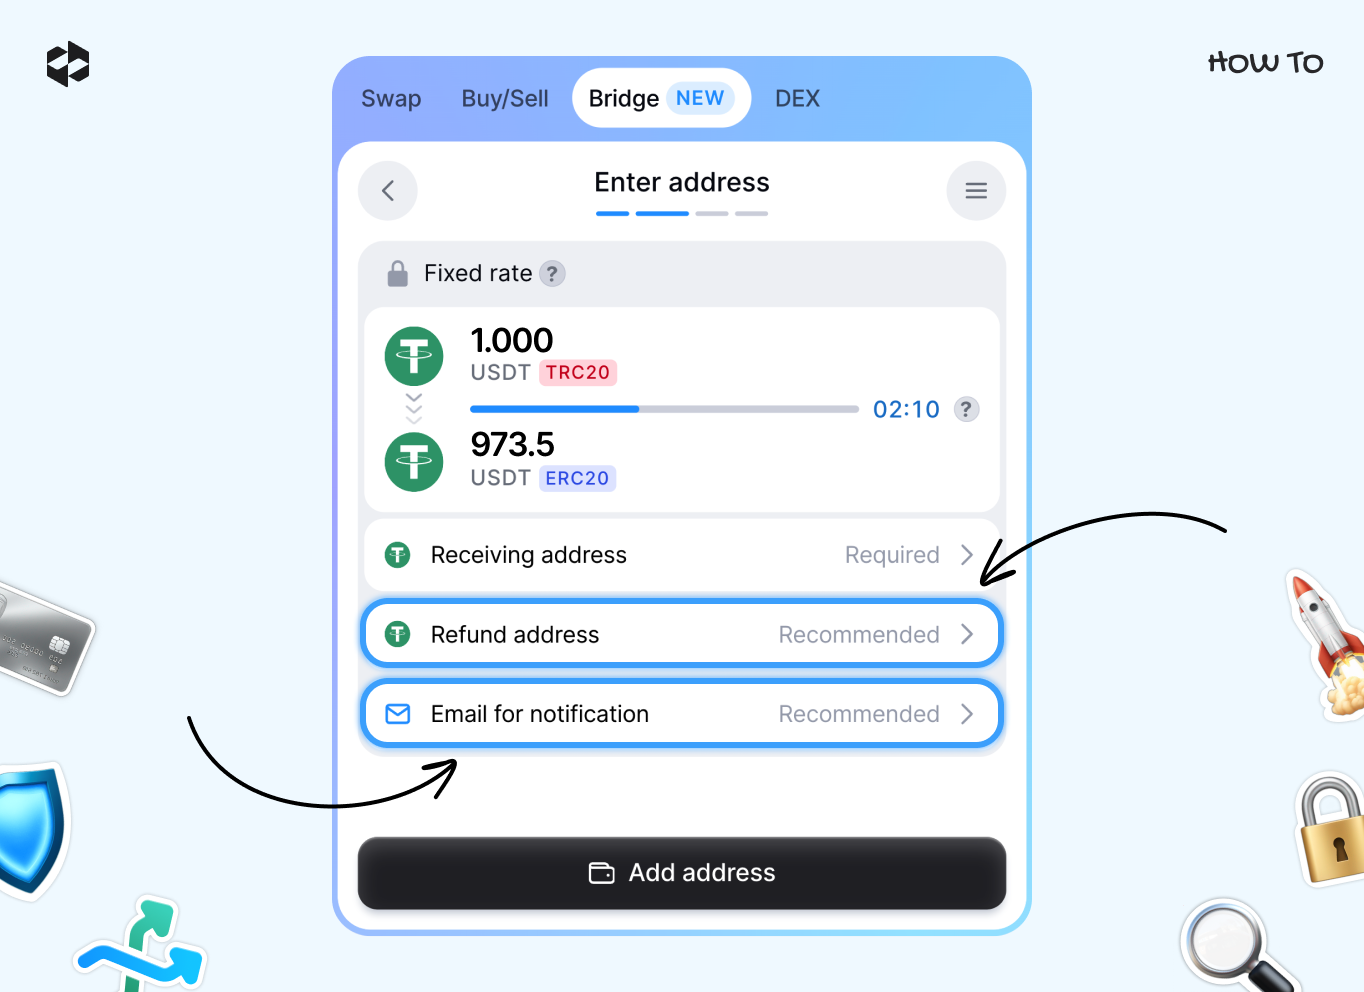
Optionally, you may provide a refund wallet address. If the swapping process goes wrong, the platform will send your tokens back. You may also indicate your valid email address to receive notifications about the swapping process.
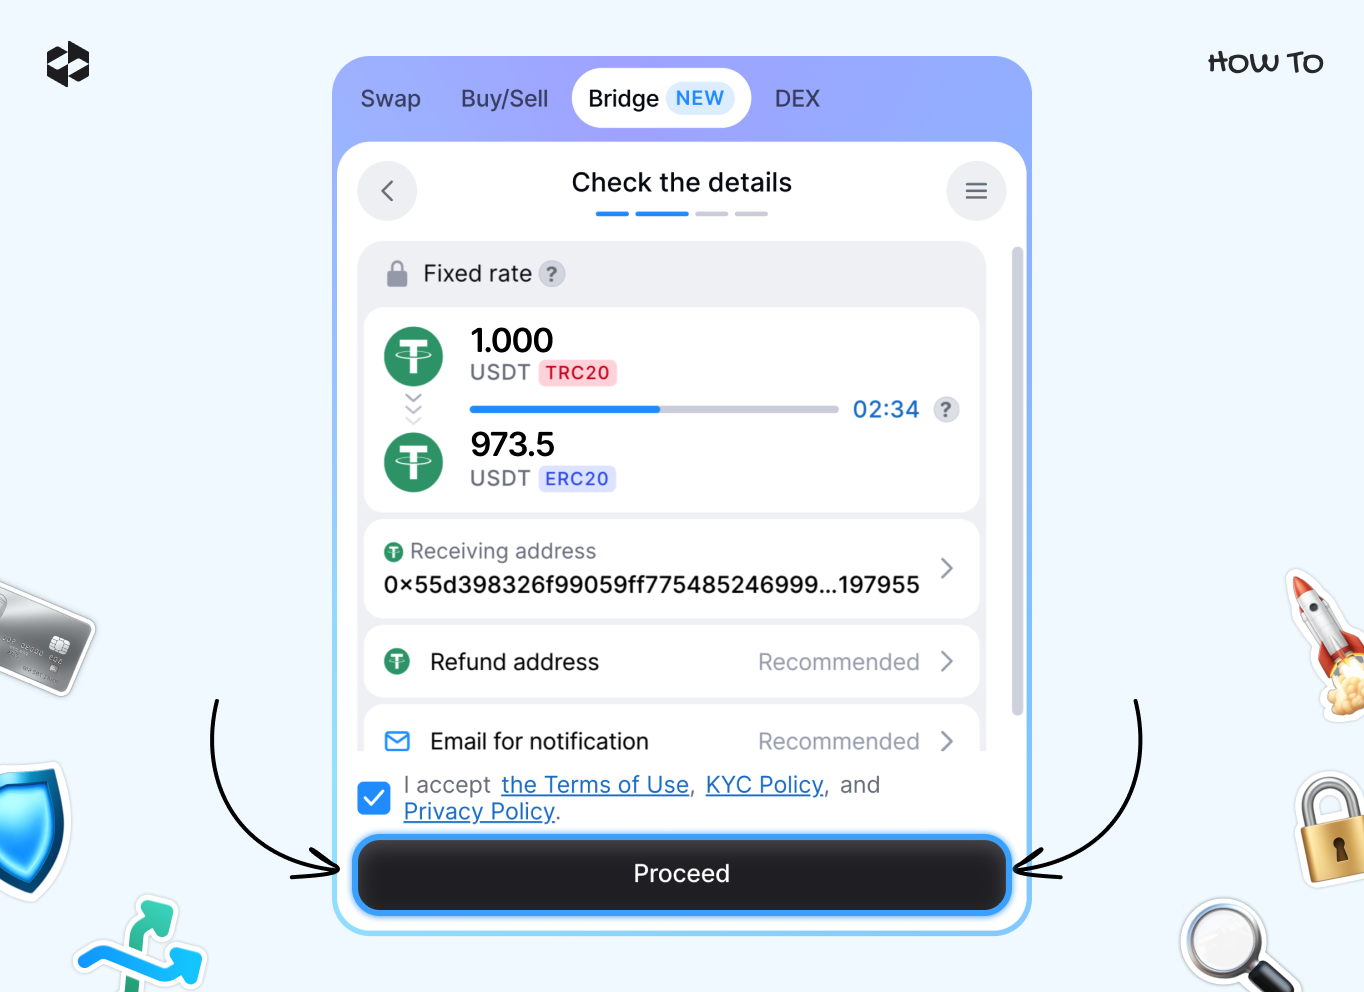
Click the Proceed button after checking all the details.
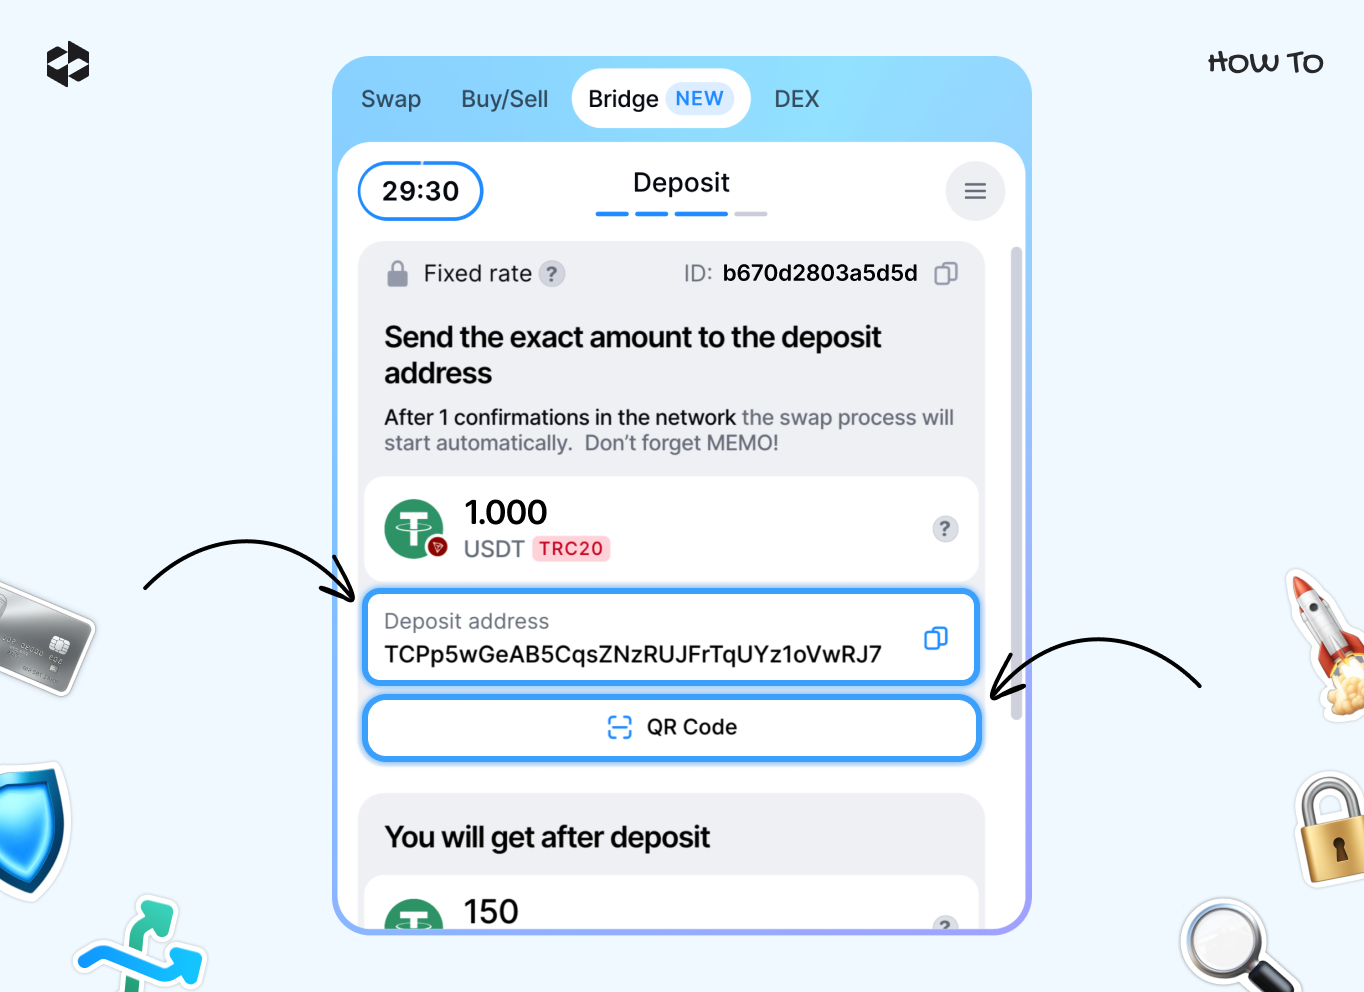
The platform will display an address. Send the exact amount of tokens that you want to swap to that address. You may copy-paste the wallet address or scan a QR code.
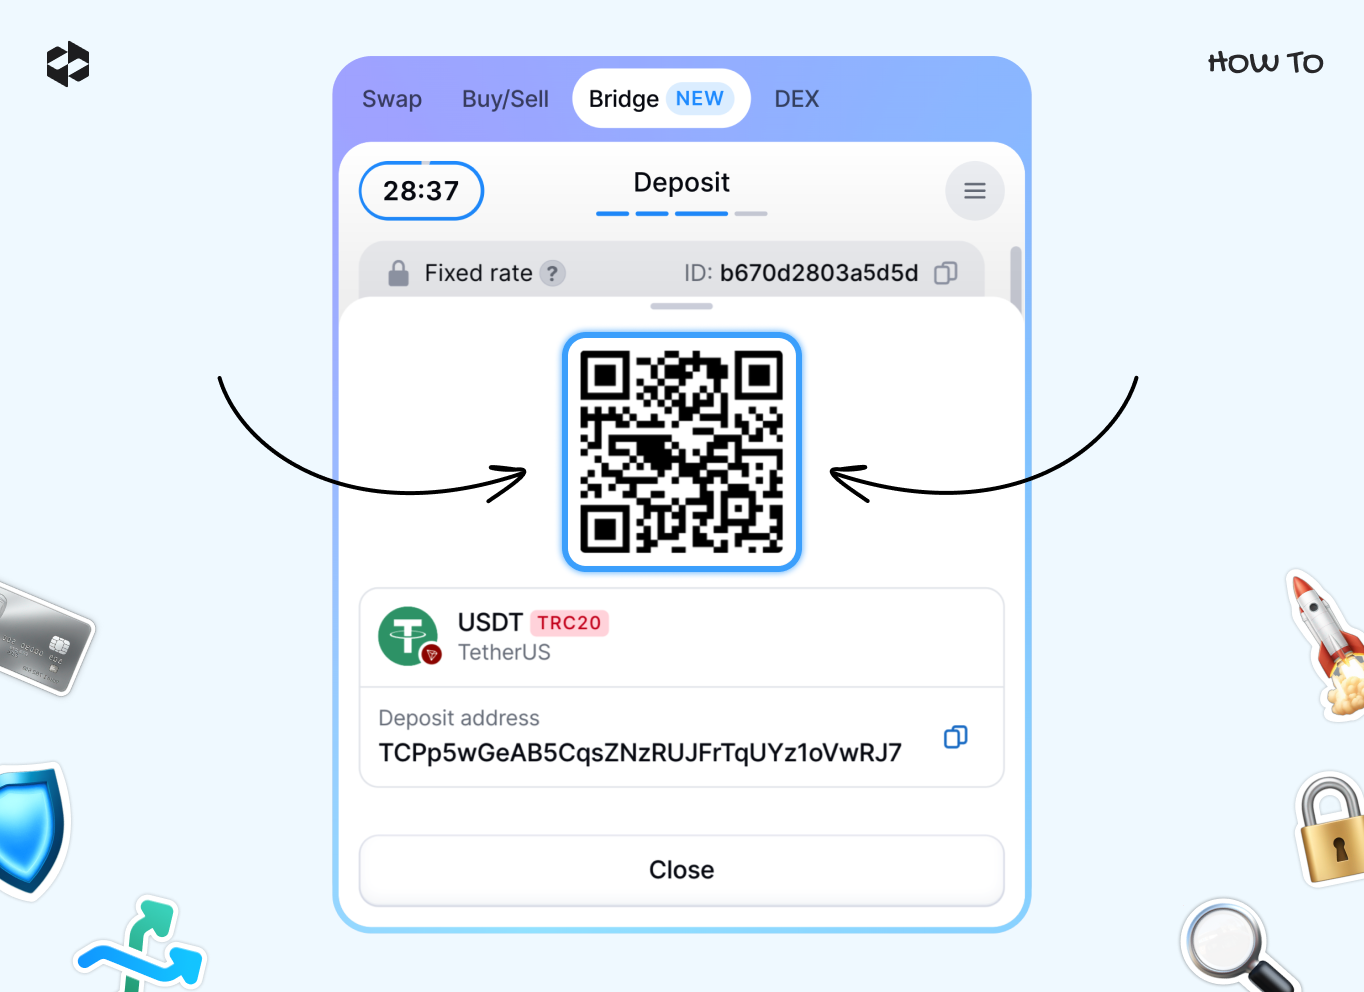
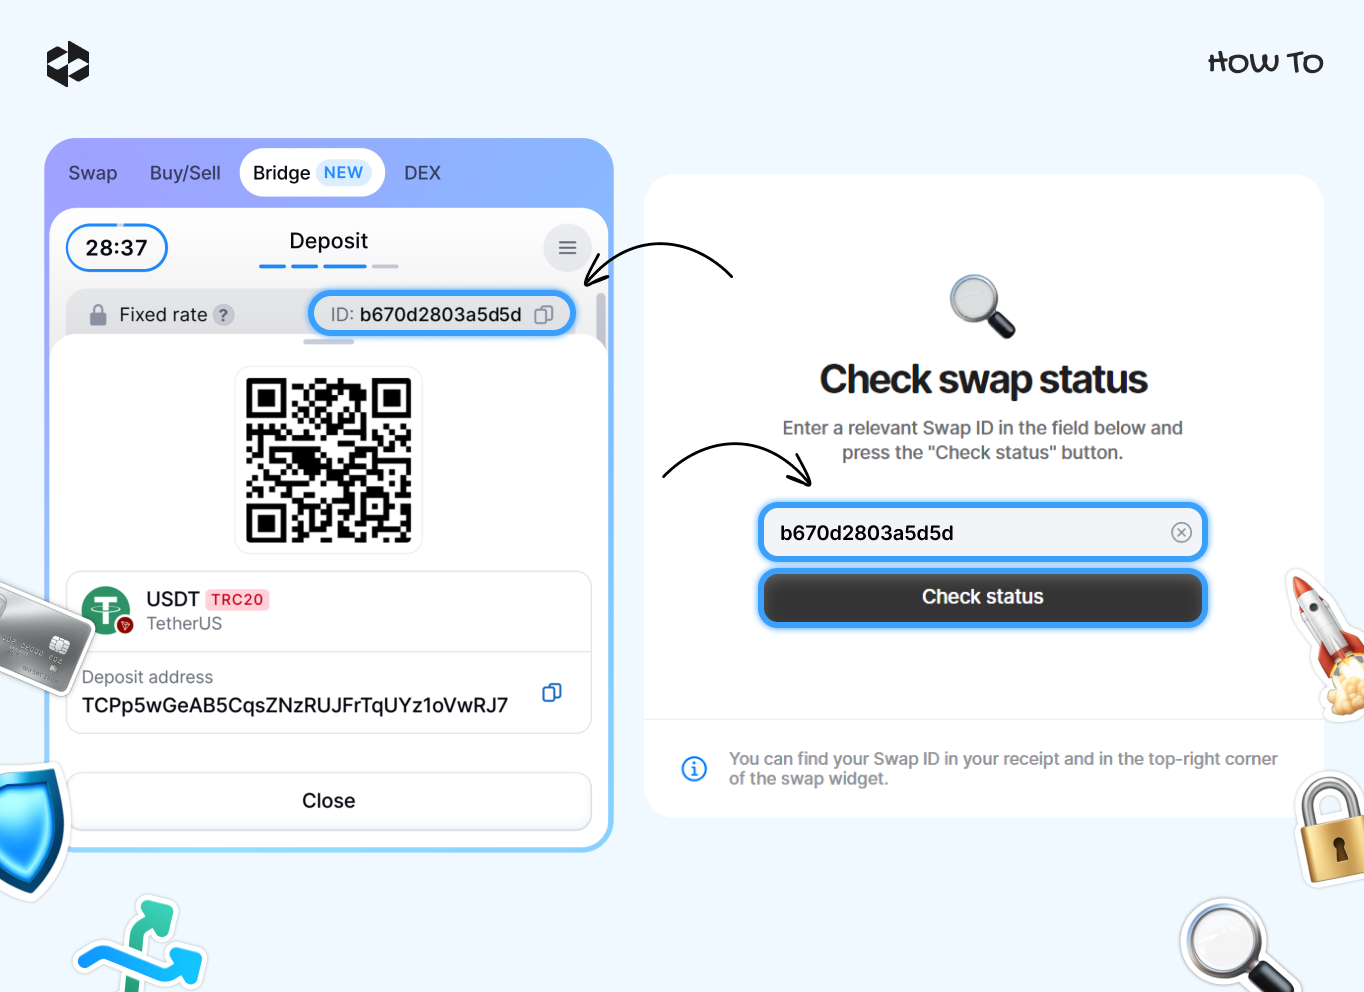
Now, the platform will process your swap, and send your swapped coins to the wallet address that you’ve provided. At any time, you can check the status of your swap on a Transaction status page. Just copy the Exchange ID (you can find it in the widget, in the upper right corner) and click on the Check status button.
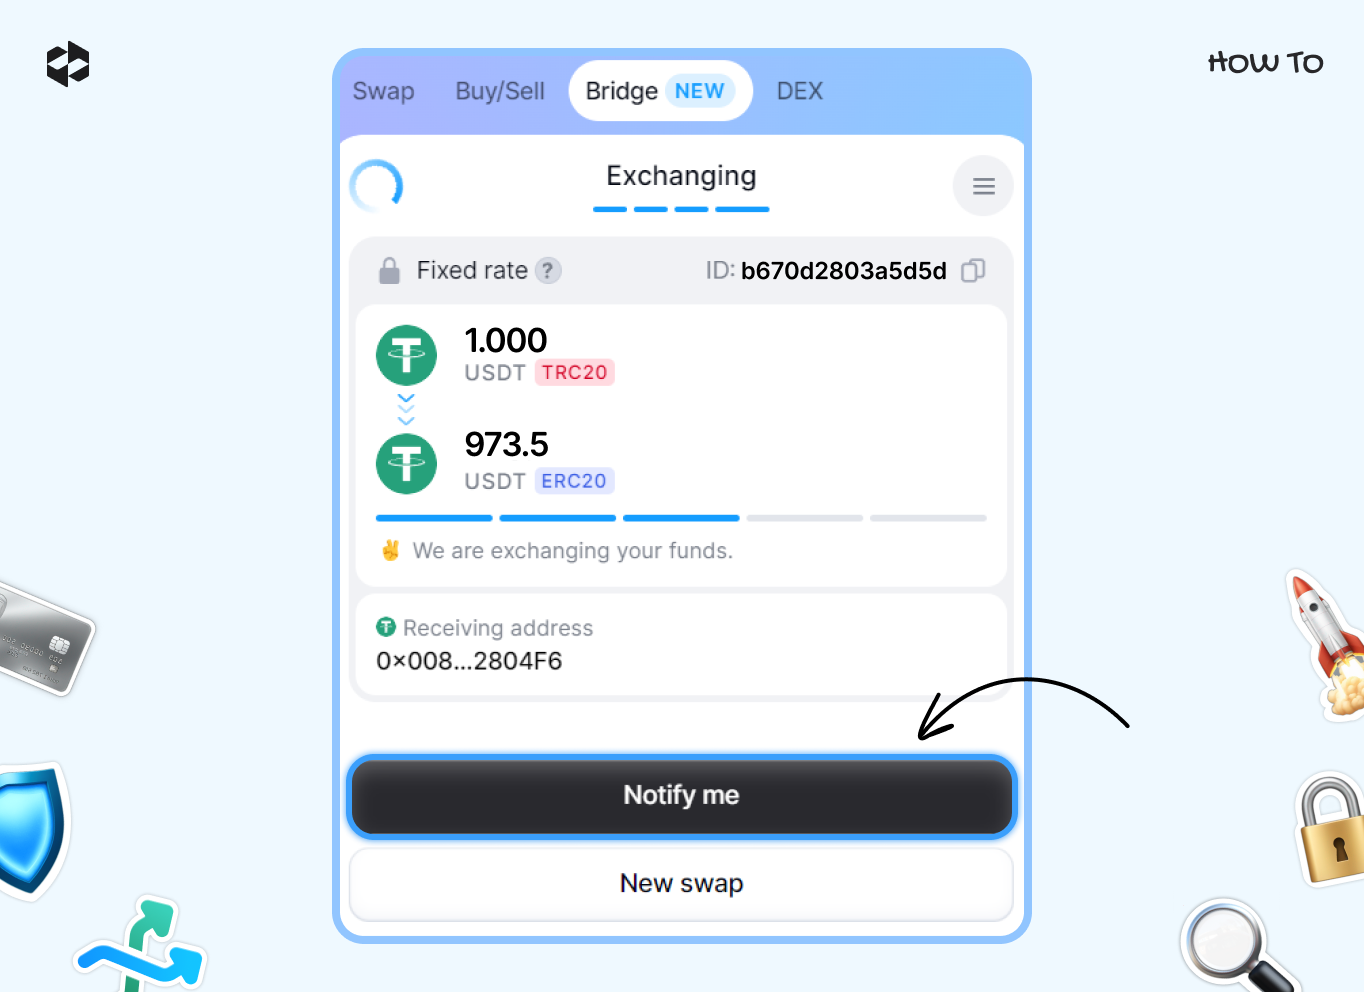
If you want to get notifications about the swapping process, click the Notify me button, and provide your email address.
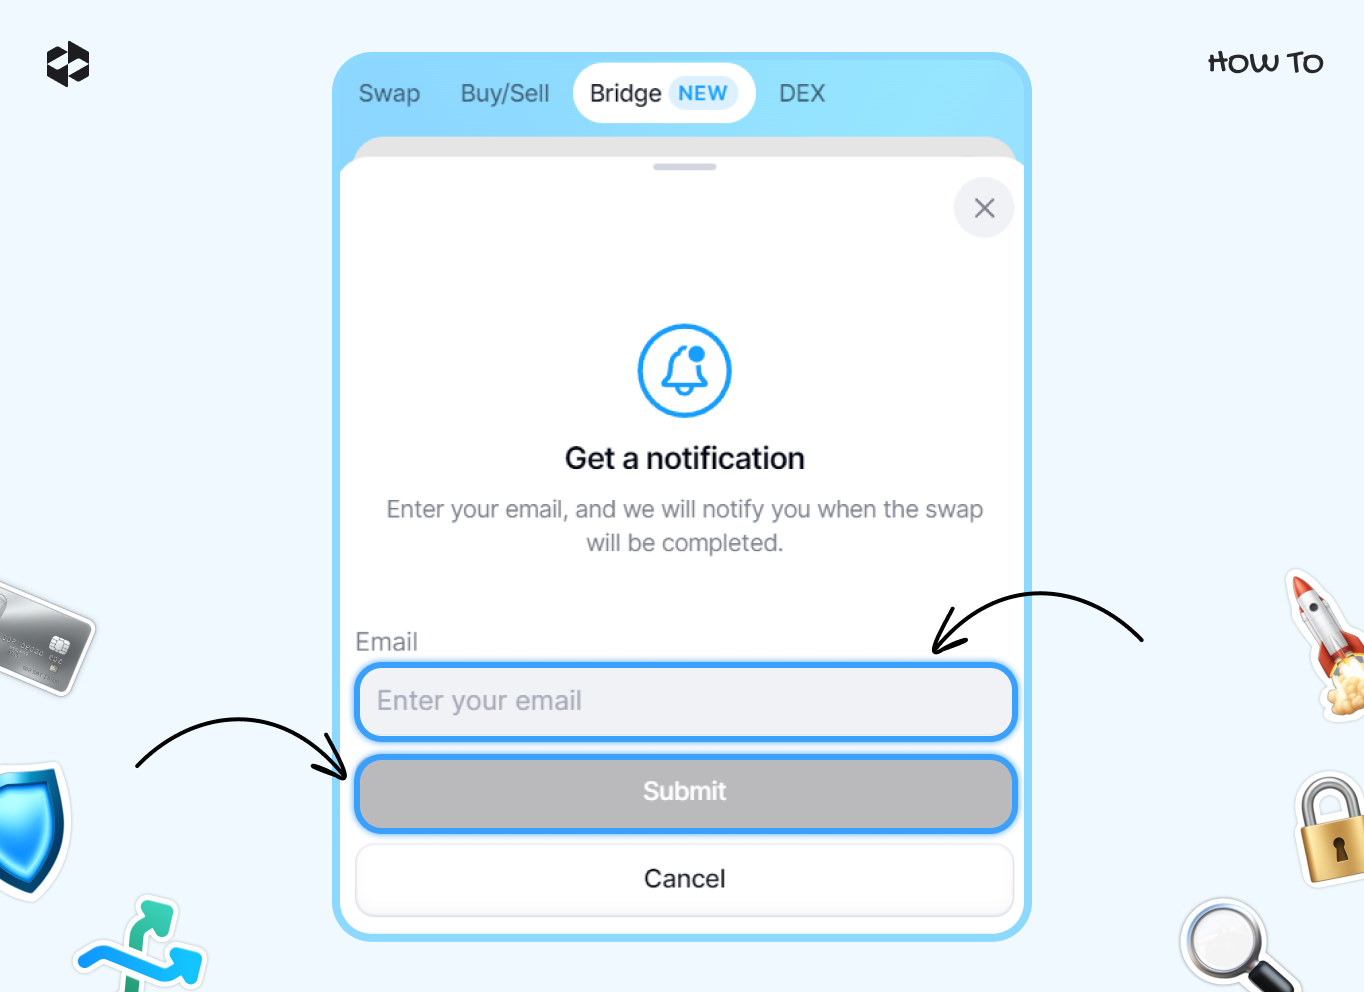
After entering the email address, click the Submit button, and you will receive updates directly in your email.
If you need to perform several swaps, you don’t have to wait until your current swap is completed. Just click the New swap button, and proceed with a new swap while the platform is processing the current one.
You will be notified as soon as the swap is completed.
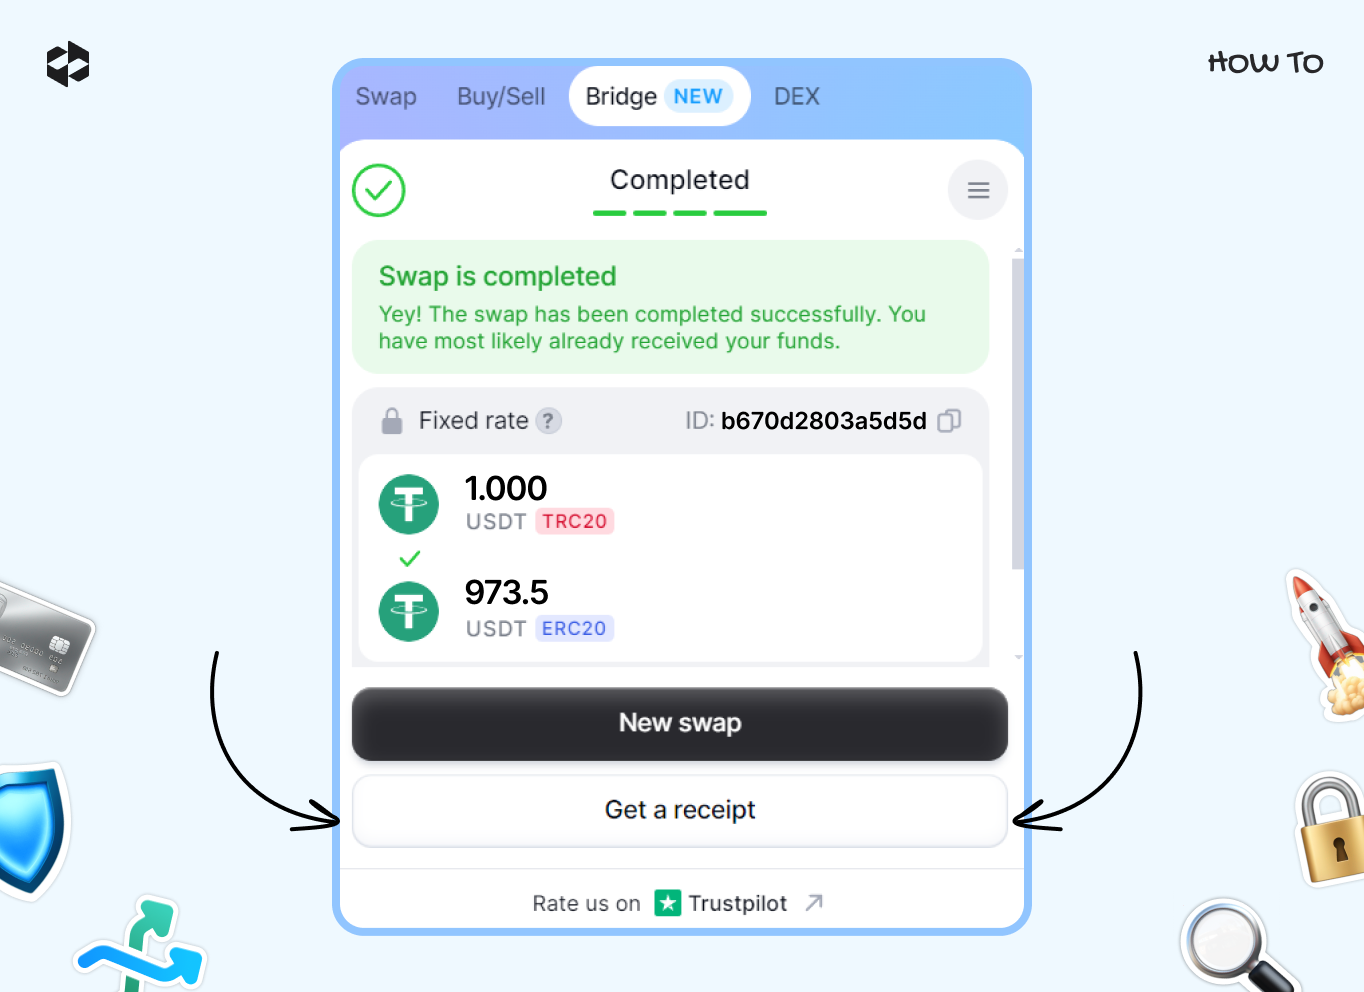
After that, you can download your receipt with all the swap details. Click the Get a receipt button, provide your email address, and click the Get a receipt button to confirm your request. The receipt with all the swap details will be sent directly to your email.
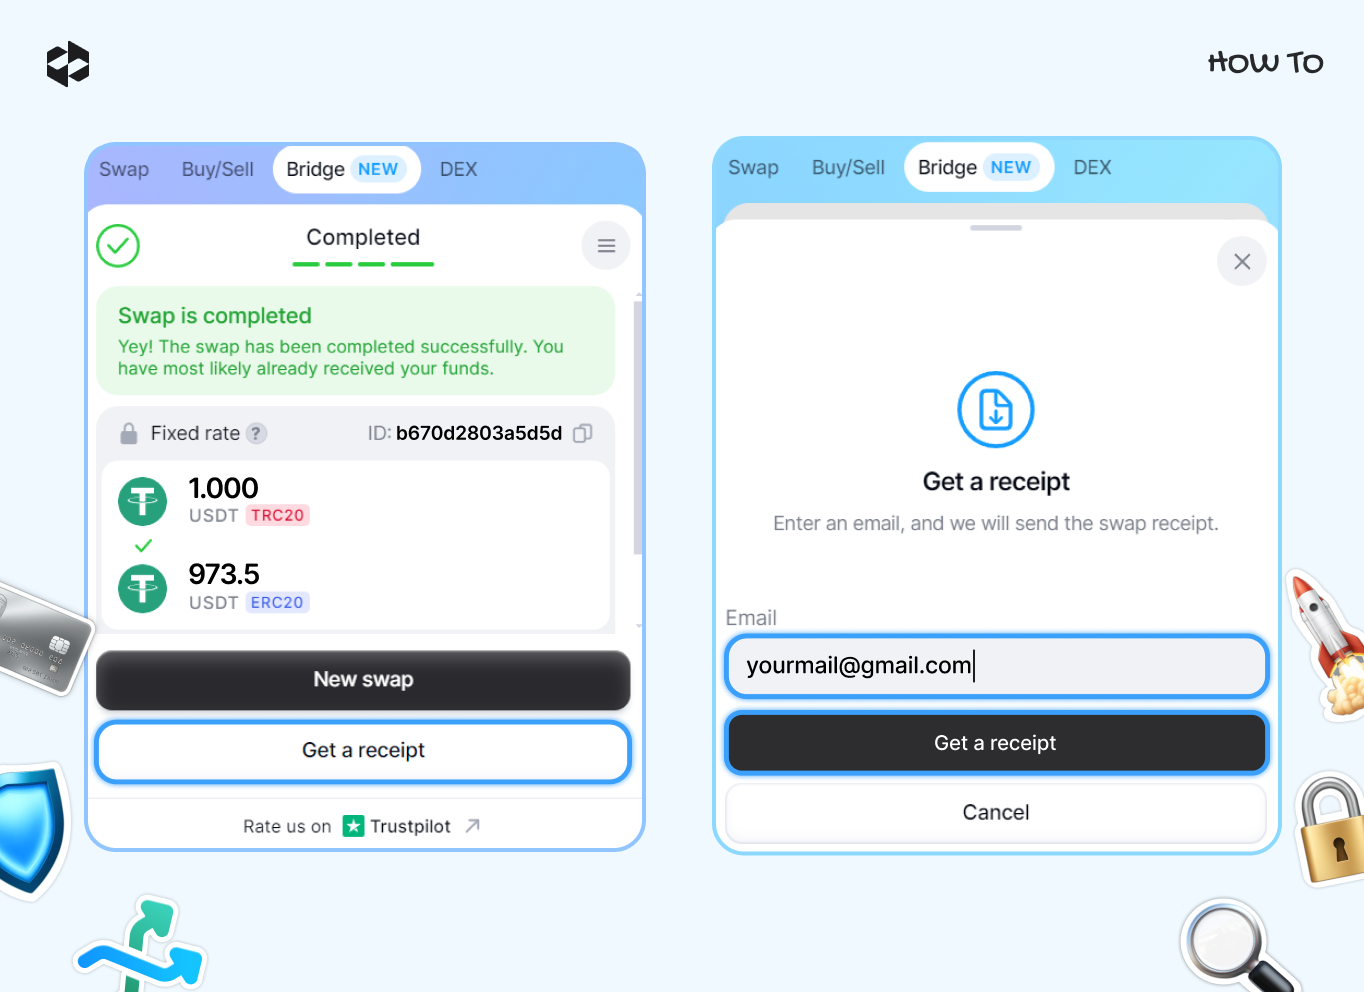
The receipt with all the swap details will be sent directly to your email.
